Shop with us!!

prizes, contests, offers--crazy cool prices!!

Spend $50 on Hero Arts and receive a Free gift from Hero Arts

Vagabond in stock now!!!!!! ONLY $199.99 and FREE shipping!!

Tim Holtz Tattered Florals are in stock again!!! Our price is only $13.85!!! (MSRP $19.99) WHAT A SAVINGS

NEW TO OUR STORE: the gorgeous Mackinac Moon range!!! Check it out!!

Monday, November 29, 2010

Whiff of Joy

Hi again dears!!

Today as I'm sure you all know is CYBER MONDAY!!! (Kinda sounds like robots are taking over the Earth dontcha think?! *wink). Anyhoo, apparently over there in the big ol' U.S of A, Cyber Monday is the day when everyone gets online and snags a bargain or two...or twenty  *lol* 
(actually I like the explanation that it's the day where everyone shops online instead of does their work lol!).

So lets get right to it shall we?! I'm going to show you some stamps that are new to our range at a2z, but we're SO very excited to have them in our store! I personally am a HUGE fan and I'm super-happy that I get to introduce them to you:

Whiff Of Joy

Whiff of Joy A Little Bit of Magic Might Help
 I just love this little elf girl image. Super super cute. I love that she would work perfectly for many times of year and many 'reasons' to send a card.  She'd also be ridiculously cute on a layout if you did one about a child having a (minor) illness like the measels or chicken pox.--or even a scratched knee.  My daughter has to have a bandaid put on EVERYTHING even if it's just a bumped finger lol!

Whiff of Joy Henry Celebrating Mouse Stamp
 Whiff of Joy has such an array of images that range from beautiful to cute. This one takes the cake *pardon the pun* for the cute ones! Just look at his huge ears!
Whiff of Joy Ice-beary Greetings
 Perfect for Christmas cards!! Even a winter themed layout--what a gorgeous little bear!
Whiff of Joy Oakley Sitting
This little Oakley Sitting image is one of my favorites.  Plain and simple. I love his shoes, his little pants, his cute messy hair. *love*
Whiff of Joy Fence Stamp
Using Inkadinkadoo or Copic Masking paper, you can have Oakley sitting on this fence (or in front of it).
All you have to do is stamp Oakley onto your cardstock/paper, then stamp him again onto masking paper, cut out the image (stay right on the line with your cutting, if you cut just outside the lines, you'll have a 'ghost-line' where your next stamped image wont quite sit properly).
Peel the backing off the masking paper stamped image, then 'stick' it onto the original image you stamped on your cardstock. Next, using your stamp-a-ma-jig (or just stamp freehand), stamp the Fence over the top of the masked image of Oakley.  When you peel up the masking paper, it will look like Oakley is sitting on top of or in front of (dependent on where you sit him) the fence!  (I'll do a tutorial on this in the next week or two if you like--let me know in the comments :))

Whiff of Joy Angel Delivering the Christmas Tree
 Just look how beautiful she is. Need I say more?
Whiff of Joy Baby Jesus Stamp
 Perfect for Christmas!!
Whiff of Joy Ben and Nora - New Year Couple Stamp
These are new to Whiff of Joy--and they are CUTE CUTE CUTE!!!  I can't wait to get my hands on this one :)
Whiff of Joy Cheers to You
 Cute for tags, place cards, backgrounds...the list goes on and on!!
Whiff of Joy Willow with Toddler
I just got this beautiful beautiful stamp in the mail today *claps hands* I canNOT wait to use it.  It's so beautiful. I'l be using it on a layout about my daughter. It will come in handy when a friend of mine has her baby (she's due soon!)


To see the rest of our Whiff of Joy Range, click HERE.

Well loves, that's all from me today! hope you head over to the store and find yourself everything you need and want at fabulous prices!

Talk to you soon sweets!

Linda x

Sunday, November 28, 2010

Just Rite, Hero Arts Stamping goodness at fabulous prices!!!

Hi again!!

I'm going to cut straight to the chase now: Have you seen some of the fabulous prices we've got for all your favorite stamp companies?!

Check them out:


THESE are my favorites:
so perfect for so many things!! You could use these on place cards, christmas cards, as cute little tags!!        

 and how about these?

SO VERSATILE!!!
These are fantastic too--so great that you can custom make your stamps JUST how you want them :)


Now, anyone who follows my personal blog or has been watching this blog for a while, would have figured out that I'm crazy for Hero Arts and with these beauties--who would blame me?! Take a look at my faves:

Hero Arts Canvas Stripes
 So versatile. It can be masculine, pretty, babyish or mature. I just love the possibilities with this one :)

Sunny Smiles Stamp Set

 So pretty!!! I can just see this as a card, on a letter set, in so many different colors, using many different techinques--I love stamps that give me a lot of choice as to how I use them :)

Now for some of my favorite Christmas ones... These are so cute. I'm using them a LOT.

Christmas Cookies

Hero Arts Christmas Trio

Hero Arts Decorated House Stamp

Hero Arts Happy Holiday Tags
Hero Arts Winter Butterfly Stamp
 
To see our entire range of Christmas and holiday themed Hero Arts stamps, click HERE

Make sure to check back later on for another post all about Whiff of Joy Stamps--so beautiful!!

 Talk to you soon sweets!

Linda xx


Friday, November 26, 2010

Tim Holtz TIIIME!!! Games, Prizes, AWESOME PRICES!!!

Happy Black Friday to everyone!!!

I hope it is filled with fabulous prices and excellent bargains! (Not to mention an easy day for those tummys that I'm sure are still full from yesterday's Thanksgiving Feasts!)

Here at the a2z Blog, Black Friday means Tim Holtz!!! *woohoo!!!*


Today's game: Tim Holtz Word Scramble!!!

The Prize is a fabulous Tim Holtz --
Snow Flurries Embossing Folder worth $15.99!!!

Tim Holtz Snow Flurries and Snowman Embossing folder
Solve the word scrambles below and send your answers via email to lindatrace@a2zscrapbookingsupplies.com and the winner will be chosen randomly from those who correctly unscramble all the words!
**Editors note, there were a couple of incorrect letters in the original post. THey have now been edited out and are correct-sorry for the mix-up!

1. ganisnourcitfo
2.vracde mtnonsaer
3. msrstpae yosuonamn
4. dggronabuer
5. gdeaa ktsctei
6. ytin tcetahra
 *** these are ALL the names of Tim Holtz products.  HOWEVER some are not the entire name, for example Tim Holtz Distress Ink Fired Brick --would be too long, so it would just say "Fired Brick" (but scrambled).  If the scramble appears as two words (i.e. there is a space between), then the name is 2 words (like 'Fired Brick'). If it appears scrambled as one word, then it is a one word name such as 'Masks'.

NOTE: PLEASE DO NOT POST THE ANSWERS AS A COMMENT TO THIS BLOG POST!! (You'll give the answers away to everyone!!) email the answers (in the correct number order as seen here) to the above address, with your full name.  Please also put "Tim Holtz Scramble" in the subject line :)

Winners will be chosen at random from all correct entries. ALL words must be unscrambled correctly to be considered eligible for entry into prize draw.  If any words are unscrambled incorrectly, then no entry into the draw will occur.  You have until Monday 8pm EST.
GOOD LUCK!
 ---ooOOOoo---
How about another EASY way to win more Tim Holtz?!  
Simply make a Tim Holtz Purchase of $25 or more this weekend and be entered in a contest to win Tim Holtz Townscape Die  or Tim Holtz Seasonal Stickers!!!

And finally, what about a list of your favorite Tim Holtz products (and their links of course *wink*)  at RIDICULOUSLY LOW prices?!

PHEW!!! I don't know about you but I'm exhausted from all these bargains!! Maybe I'll have *JUST*  enough energy left to buy some of these for myself (teehee)

Talk to you soon lovelies!

Linda x

Thursday, November 25, 2010

Happy Thanksgiving To you all!

Hello sweet friends!

This will be a short post today because I want you to all get back to your families and loved ones on this special day. (Don't forget to follow us on Twitter for all the super prices we've got for you today and over the next few days *wink*)

We at a2z Scrapbooking Supplies would like to thank each and every one of you for your support, friendship, loyalty and all around loveliness.  It's been so wonderful to get to know you all over the past few years and months and we're so thankful for you all.

This is such a special day and how wonderful to have an entire day dedicated each year to doing nothing but give thanks. (And I believe, watch a certain parade on TV?!?)

Happy Thanksgiving to you all and THANK YOU for being you :)

The a2z team xx

Wednesday, November 24, 2010

Copic Copic Copic Crazy Prices :)

Welcome back!!

Today is a shorter post than yesterdays, but that's only because once you see the prices of the Copics below, I think you may need medical attention--to help you recover from the fall from your chair *teehee*


Copic Ciao Marker 12 Set Basic Colors $29.95  (MSRP $51.48) What a fantastic price!!!
 
The Ciao is the perfect entry level marker.  It has a great color selection and a lower price! Ciao markers feature a Super Brush nib on one end and a Medium Broad nib on the other. The alcohol based inks are permanent, non-toxic, low odor and acid free. Ciao markers have a 3 year shelf life and are guaranteed for color consistency. See HERE for my earlier blog post about Copics :)

These fantastic glittery pens are water based pigment markers inspired by the star of Virgo; twinkling in the night sky.  They are just the thing to bring that finishing *glittery* touch to your project--at this price, you can get both sets!!


For all the other Copic Ciao Markers at SUCH a wonderful price, you can easily complete your collection in no time at all!  What more do I need to say!? Click the link above to see the full range of colors for you to choose from!


Well that's all for me today lovelies!

I'll be back again tomorrow with even more :)

Take care and see you again soon

Linda x


Tuesday, November 23, 2010

Machines and tools to make your crafting easier...

Hi there friends!

As I'm sure you're all VERY aware, this week is Thanksgiving and that means...BLACK FRIDAY!! Shopping at this time of year can definitely save you a HEAP of money, especially with all the great sale prices I'm sure you'll find all over the place.

At a2z Scrapbooking Supplies, we're no different!! This week we'll be highlighting some of the BEST prices you'll find anywhere.

Today we'll be focussing on the tools and machines that can help to make your crafting experience easier and lift a simple project to something really special.


This machine is the cats pyjamas--SUCH a fantastic tool to have, it does practically everything for you!  The Grand Calibur cuts and embosses up to 8 1/8″ wide! It accommodates 8 1/2" x 11″ paper without needing to trim it down and can cut OR emboss multiple shapes in a single pass! It’s compatible with all Spellbinders die templates so you'll have no need to waste money buying replacement dies--PERFECT!

At this price, you can afford to get one for yourself AND a close crafting buddy :)


Now THIS is something I definitely need--I might even get one for my mum and she doesn't even craft! It's so perfect for every day 'non-craft' use, (not that I really understand that  term...I don't think I do anything non-craft *wink*!!)
The durable steal holder attaches to the edge of most flat surfaces and is designed to hold a drink and reusable trash bag (included). Holds 32 ounce drinks.


How about an item you can use to strengthen core muscles (which means a nicer tummy and better posture) as well as allows you to craft for longer, more comfortably?!

This is it! Place the softly inflated disc in your chair to prevent fatigue, reduce pressure on the tailbone and help to relieve lower back pain. Place the smooth side down on your chair. The texture allows air flow for cooler seating and promotes improved blood circulation. Air filled and will stay soft and comfortable.

This isn't just for your craft chair, it can be used in any area that you sit for extended periods of time!


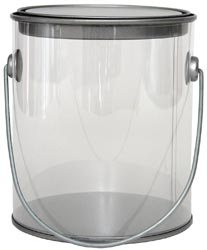
The Stampendous Plastic Pail Quart is so cute and versatile!! It can be used for storage or decoration and can be purchased in various sizes to create a set. Each pail has a transparent side with a tin top and bottom. Use them as decorations that you can alter to fit any style or color-palette, or as great storage containers-- with the clear side you can easily see the contents and the snap on lid keeps items safely inside. Quart 4 X 5 inches.


The same fabulous Big Shot machine we've all come to know and love for it's versatility, ease of use and outstanding results, but this has gone another step further into fabulousness--it's electric!! Say goodbye to the crank mechanism of the original and hello one-touch button die cutting and embossing!
The Big Shot accepts most dies-no matter the manufacturer, cuts paper, cardstock, fabric and much more, The Multi-Purpose Platform makes all Sizzix components compatible with the Big Shot and even works with other brand dies and embossing tool--not to mention has a fantastic easy-to-follow picture guide 'how to'. At this price, it's a steal!!

**This product is only compatible with power requirements found in the USA and Canada and as such, may not work in international electrical outlets.**


This is my personal favorite binding tool.  You can create one of a kind albums, calendars, journals and recipe books. Numbered register marks allow for punching accuracy for projects up to 12.5". Left and right hand application. Weighs under 3 lbs.  So easy to use and perfect for all projects! This price is simply outstanding!


Please note that the sale prices for all the above items start November 24th and are valid until November 30th!

Well, I think I'm sure to have overloaded you (and your shopping list *wink*) with that lot of goodies, so I'll leave you for now. Be sure to check back again tomorrow for even more great products and awesome prices!

Take care sweet friends!

Linda x

Sunday, November 21, 2010

GIVEAWAY!!!

Hello everyone!!

I have some VERY exciting news for you today!!  *claps hands* As I'm sure you all know, Black Friday is coming....SOOON!!!  We at a2z Scrapbooking Supplies have gone a little Black Friday Crazy!! So crazy in fact, that we thought, what better way to celebrate the coming of one of the busiest days of our calendar by having a GIVEAWAY!!!

All you have to do is sign up to be a follower of the blog (or in our way of putting it, join our "a2z Craft Club") before November 30th and you could win a huge Hero Arts Prize Pack worth more than $50!!!

ALL of the following stamps:


Hero Arts Happy Holiday Tags

Hero Arts Bold Pumpkin Stamp

Hero Arts Christmas Cookies Stamp

Hero Arts Decorated House Stamp

 
Hero Arts Winking Reindeer
AAAAAND as if all those stamps weren't enough...what about a pack of these:
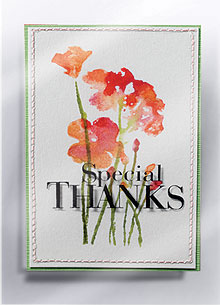
Hero Arts Acetate Cards
NB: These cards are clear acetate. The picture used is only for illustration purposes
HOW AWESOME IS  THAT?! 

You'll have everything you need to get your cards made for the rest of the season! *yay!!!*

SO--to recap, all you need to do is sign up to be a follower of our blog (if you're already a follower, you have an entry already) 

Want an extra chance to win?!?! Thought so *wink*

..if you get a friend (or two, or three...) to follow us too, put a comment at the bottom of this blog entry  AFTER they've signed up,  tell us the 'screen name' or username (the one they'll use) and YOU get an extra entry for each friend!!

NB: If you send us the name of your friend but they don't sign up, you'll only receive the entry for your own 'following'.

That's it!!

Happy "Following"!!! *wink*

PSSSST: Make sure to sign up for our emails on the right hand side of the blog (over --->>>there!) and check back regularly over the rest of this week (till November 30th), because we'll be hosting plenty of contests and games with PRIZES to be won!!!

Linda xx

Saturday, November 20, 2010

Christmas cards to inspire Day 4: Distress Ink Swiping

Hi there,

Welcome to day four of my Christmas Cards to Inspire!!

Hopefully I got the look of the snowy night correct, here in Perth, we literally NEVER have snow.  I've seen snow a total of twice, once it was falling in the distant mountains when I was in Hiroshima, the other time it was on the ground, in Niseko (a small town in the North of Japan).  I was in heaven and can't wait to see it/be in snow again. Till then, my little snowy christmas card will have to do! *wink*

Here is today's card;


This card is SO easy and perfect for mass production;

First I took the Hero Arts Starry Night stamp and wiped Black Soot Distress Ink from left to right. I then stamped it onto white cardstock.  The 'wiping' created a look of a snowstorm/a windy snowy night around the trees.  *LOVE*

Next I rubbed a tiny bit of Mustard Seed Distress Ink over the largest star in the top right corner, to give it a glow.

Then I added some Diamond Stickles to the ground and stars (a tiny bit to the tree branches would work too, but I left mine bare).   I tied some red and white striped bakers twine around the image, tying it to a button.

Then I adhered the white stamped cardstock onto a slightly larger piece of black cardstock, to create a matte.  Then I adhere both layers onto a piece of white textured cardstock that I had cut to size and scored in the centre to make the card.

On the inside (not pictured), I stamped a Christmas sentiment with Versamark ink and embossed with Stampendous Red Transparent Tinsel Embossing Powder.

That's it!! Like I said, super easy and perfect for mass production!

Hope you like it!  Let me know what you thought :)

See you tomorrow with another card!

Take care lovelies 

Linda xx

Friday, November 19, 2010

Christmas cards to inspire Day 3: Distress Resist

Hello again my dears!!

How are you all today? I'm DYING of heat exhaustion here in Perth today.  We're not even out of Spring yet and it was 36 degrees Centigrade here today. (That's 96.8 F) I was quite a bit like the Wicked Witch of the West this afternoon when I went out the front to get the mail...I'M MELTIIIIIIIIIIIIING *wink* (but without the socks and green skin haha!)

So anyhoo--welcome to Day three of my Christmas Card Inspiration Week!  Let's get straight to the card--I'm pretty happy with this one :).

The techniques I used on this one are Heat embossing and a technique called "Resist".


Here's how I did it:
The embossing will resist the distress ink you put over the top. Just make sure you wipe over your embossed areas to remove any excess distress ink that might be there and to really make your embossing powder's color shine through. (this is the technique called "Resist). 

I'm starting to really utilise the insides of my cards now. I love adding a little something extra wherever I can.

Anyhoo, that's it! Super easy and it would really be easy to make multiples of these! I'd just stamp the Wreath image all over a bigger piece of cardstock and emboss it all, then cut it down to size! 

One more quick note--You can do the first few steps in the opposite order; the distress inks first and then add the embossing over the top.  This will only work when you are using colored embossing powder, but if you're using clear powder (so that the color of the cardstock underneath will show through), you must do the embossing first, then go over with your distress inks second.
(Because if the embossing powder is clear--and on top of distress inking- the distress inks will show through and you wont see your embossed image, it will just blend in with the distress inks colors.)

**A tip!!  If you do go the other way around (Distress ink first, then emboss over top), make sure the Distress Inks are completely dry before stamping the 'Versamarked' image (and most importantly, the embossing powder). If it's not dry, when you pour the embossing powder on, it will stick to the entire cardfront, not just the image you've stamped with the Versamark--very annoying...trust me *wink*
Have fun with this! It's a favourite technique of mine!

Talk to you tomorrow!

Linda xx

Thursday, November 18, 2010

Christmas cards to inspire Day 2


Hello!!

Welcome to day 2 of my Christmas Cards to Inspire week!

Yesterday I showed you the pretty effects if you use Distress Inks as Watercolor paints on standard Cardstock (When I say standard, I mean Copic Marker X-Press Blending Card--I use this for all my stamping).

Today I want to show you the difference when you use watercolor paper, which has much more texture and thus, a better ability to tolerate more liquid.  It also leaves a pretty textured LOOK about the image, which I think is perfect for animals like...(you guessed it!! That cute little reindeer again) *wink*

Let's get straight to the card shall we?

This card has a really cute rustic feel about it, which I love. Sometimes I absolutely hate cards that--how can I put this the right way?!-- Take themselves too seriously.  Does that make sense?! I love cards that are pretty or cute or even whimsical--but no matter what, I love them to have a hand-made look, which this one does I think.

I used two techniques to create this one.

The first is using the watercolor paper with Distress Inks.  The second, is using my Acrylic Block to create that bluey-grey background.

To achieve this second technique (which was actually my first step), I dabbed some Tumbled Glass and Stormy Sky as well as Weathered Wood Distress Inks onto my acrylic block (Yes, I said ONTO the acrylic block---not the stamp).  Then I spritzed the acrylic block with a good 6 or 7 spritzes of water using my Ranger Mini Mister and then 'stamped' it onto Hero Arts Bright White Watercolor Paper .

I then cut my cardstock a 1/4" larger than the square of ink my acrylic block created (to leave a border of white). Then I edged my paper with Walnut Stain Distress Ink.

When the paper was dry, there was a really clear space in the color from the acrylic 'stamping', so I used that space to stamp my Hero Arts Fancy Reindeer in Black Stayzon Ink.
When the Reindeer image was dry, I used the same painting technique mentioned yesterday. I put the Frayed Burlap Distress Ink Pad upside down on my Ranger Inkssentials Craft Sheet to put the ink directly onto the craft mat, then spritzed with water.  Using a fine-tipped paintbrush, I painted the reindeer.  To give some shading, I waited for the ink to soak into the paper a little before putting a slight second 'coat' of ink down around the bottom of the reindeer's stomach and legs.
I used Fired Brick Distress Ink again for his scarf and nose (which I also popped a dot of Glossy Accents on).

Next I stamped the sentiment from Hero Arts Sprinkle Your Holidays with Black Stayz on Ink.

Then I adhered the watercolor paper 'layer' onto a  Hero Arts Cerulean (sky blue) notecard which I had trimmed down to size.  I edged the notecard in Walnut Stain Distress Ink after distressing the edges of the card.

Lastly I added some Hero Arts Small Accent Pearl (mine were white so I colored them with a Copic marker, but you can get some beautiful Light Blue ones that would be perfect)as well as some dots of Ranger Icicle Stickles to look like snowfall (and to add just a little bling *wink*).

I couldn't resisite popping a cute little blue and silver button from my stash in the corner, threading it with some red and white bakers twine for a final touch.

Hope you liked this one! I love the homey and textured look and feel of it!  I hope my explanation of the steps makes sense to you all, if you have any questions, PLEASE feel free to email me or leave a comment!


Please leave comments to let me know what you think!

See you tomorrow!

Linda xx

Wednesday, November 17, 2010

Christmas Cards to Inspire :)

Hello again dear friends!

This week I've got some super cute (if I may say so myself! *teehee*) Christmas cards for you!

These all took me only a few minutes each to make with a few simple techniques that can create a lovely effect.

Each day this week I'll be sharing with you some ways to use products like Distress Inks and stamps --that you might not have thought to try.

The first two (today's and tomorrow's cards) I used water coloring techniques but Distress Inks instead of Watercolour Paint.  The difference between painting on watercolor paper versus 'normal' paper is pretty surprising.  Watercolor paper has so much more texture and can allow much darker colors to be 'reached' (because you can put more ink/paint down due to the absorbent nature of the paper.)
Using water with distress inks is an excellent way to achieve a great look with your favourite Distress Ink colors.  Because Distress Inks are alcohol based, they don't 'lose' their color (or intensity) when mixed with water. 

Onto the card: today's card features my favorite little reindeer:
 This card is SO simple to make it's almost criminal :) Perfect for making multiples.

Here's what I did:
Using Black Stayz On ink, I stamped the Hero Arts Small Fancy Reindeer.
Next I 'stamped' some Frayed Burlap Distress Ink on my Ranger Craft Mat and spritzed with water using my Ranger Mini-Mister.
Taking a fine 'tipped' paint brush, I dipped the brush into the ink (swirled it around to make sure it blended with the water on the mat) and began painting my Reindeer image.
No special technique for the painting is required. 
Repeated steps 2 and 3 with Fired Brick Distress ink to color his nose and scarf --choose whichever ink colors appeal to you. (REMEMBER TO WASH YOUR BRUSH OUT BETWEEN COLORS!)
Using my 3" scalloped circle punch, I cut out the painted image. (The Scalloped Circle Nestabilities Die would work just as well)
I put a TINY dab of Glossy Accents on his eyes and Ranger Diamond Stickles on his nose for extra sparkle and interest :) 
(I nearly painted his hooves, but then remembered Rudolf is a boy *wink*--my next Reindeer project will have to be a girl :) Pink or Red Hooves would be too cute! Teehee)
Using a 3 1/4" circle punch (Martha Stewart Circle cutter or Nestabilities Die would work perfectly too), cut out red cardstock.
Adhere the reindeer scalloped circle die-cut to the red circular die cut cardstock, using dimensional adhesive.
Take white cardstock, cut to size (mine is 4 1/8" wide x 4 1/8" high) round the corners with a Corner Chomper and stamp the "Merry Christmas" sentiment from 'Hero Arts Wishes Come True' Clear stamp set in red (I used Worn Lipstick as it worked better with my red cardstock and didn't blend in too much with the scarf-which I wanted to be the focus) and then again in Forest Moss Distress Ink.
 ** Try doing this last step with a smaller acrylic block if you can and have fun with it. Twist and turn your stamp around in all different directions. Leave spaces for the second color. Don't forget to stamp half off the page too, as this really makes a fun and easy (not to mention HAND MADE) background paper! The less neat and linear you make this part, the better the end result.**
I also edged my paper just lightly with Forest Moss Distress Ink using my Ranger Inkssentials Foam Blender tool, just to help make it stand out against the backing card.

Finally, cut some red cardstock to your desired size, score in the centre (I use Martha Stewart's scoreboard, but the Scorepal or Scorebuddy would also be just the ticket :))
Adhere the circular cardstock onto your 'background paper', adhere that onto the front of your card! Round your edges with a We are Memory Keepers Corner Chomper and you're done!


**Note, if you are going to cut out the image you're painting, then feel free to paint like a toddler-- messy and quickly.  *wink* Don't worry about getting paint outside the lines, you'll be cutting the image out anyway, so you wont see the 'mess'.  If you are going to use the image and some/all of the white space around it (like I did here), you need to be a bit more neat.  
One option is to heat emboss the image first (use clear embossing powder if you've stamped in black already, or black embossing powder if you're only using Versamark ink) The heat embossing will give you a 'border' as such. Because heat embossing creates a raised area where the embossing powder has set, the 'paint' will stay in the lines more--especially if you only use a little at a time.

Hope you enjoyed this cute little reindeer card and try something like this for your Christmas cards! It's fast and easy, perfect for making enough cards for everyone!

See you tomorrow!

Linda x